In this guide to film storage, we will explain how to store your film negatives safely once they have been processed.
If you want to know how to store your negatives, this guide to film storage will introduce you to the five most important things you’ll need to store negatives.
Even after it has been processed, your
When you store your negatives the main aim is to maintain their quality and appearance over time. Oils, scratches and deterioration are some of the things you are protecting your negatives from when storing and handling film.
You also need to be aware of dust and dirt. All these things will damage your film over time. The last thing you want is to damage your original negatives.
By using these few simple film storage items, you can ensure your photos will stay in top condition, ready for the next time you need them.
1. Negative Storage Pages
Negative Storage Pages, sometimes known as negative sleeves, are used to protect your film from dust and scratches when they’re being stored. As well as keep them organised. They are available in a range of sizes to accommodate different film formats.
In any guide to film storage, this is always going to be number one. Storage Pages are probably the most important element of your negative storage as they will be in direct contact with your film for long periods of time. So it is important to know that the negative sleeves you are using are up to an archival standard.
We sell two types, made by Printfile and Kenro. They come in different materials, and both are safe for the long-term archiving of film.
Using negative sleeves alone is the most basic level of protection you can give your film. Use them with a suitable storage box or binder to improve the security of your film.
2. Negative Storage Box
Once you have shot more than a few rolls of film, you will need something to keep all your Negative Sleeves in. A Negative Storage Box is a perfect solution. Made from an acid-free board, it is archival, durable and low cost. With a fitted 4-hole ring binder, you can comfortably keep at least 100 full film sleeves in one box. Plus, you can easily add more boxes as you shoot more film.
The key difference between these negative storage boxes and a regular ring binder is that they are specifically designed for the long-term storage of negatives. All the materials used are suitable for archiving. And, importantly, the clamshell box construction will keep your film protected from light and free from dust.
These boxes are our most popular solution when it comes to storing film negatives and slides. They are great for organising any size archive. Make sure you keep your Negative Storage Box in a cool and dark place. Somewhere dry, where the temperature doesn’t fluctuate much.
3. Cotton Gloves
These simple gloves can prevent any damage caused to negatives during handling. Cotton Gloves are perfect for use when you need to touch film and prints, particularly during scanning and printing.
Made of unbleached cotton, these lightweight gloves will help protect your film from oils and dirt on your hands. Equally, they are handy when dealing with any precious photographs, or photobooks.
Cotton Gloves are a cheap, but essential addition to your film storage kit. It is worth picking up a couple of pairs so you never have to handle your film without them.
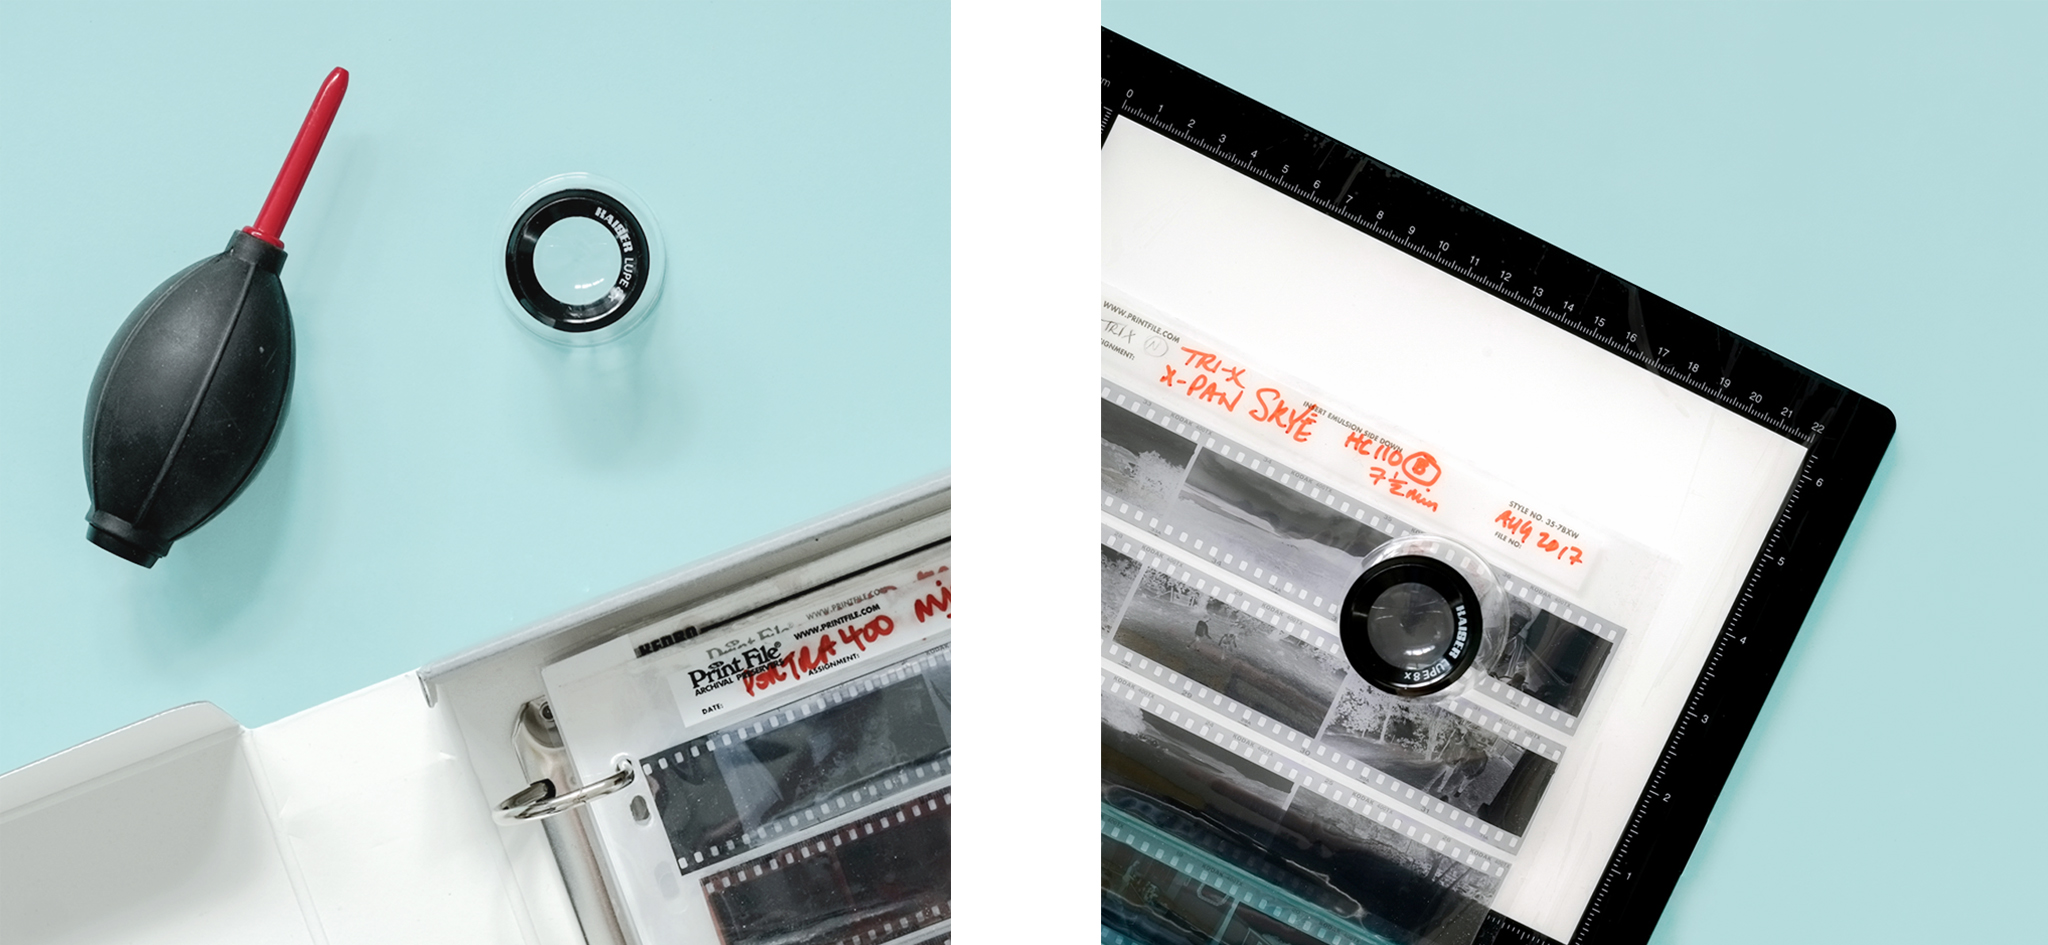
4. Air Blower or Compressed Air
It is important to make sure your negatives are clean before storing them. Fingerprints, dirt, and dust often contain chemicals or fungus spores that can harm the image over time. An Air Blower or Compressed Air can be used to safely clean away any dust from your negatives before placing them into storage pages.
Equally, they are both useful when scanning or printing in the darkroom. Effectively removing dust and particles from the surface of your film.
Any contact you make with the surface of the film has the potential to cause damage. Therefore, using air to clean your negatives is ideal because you are cleaning without touching the film surface.
5. Film Cleaner
If you find your negatives have tougher dirt that cannot be moved by air alone, then you can use film cleaner. Ideal when you want to remove grease and dirt from your film. You simply wipe the film down with the liquid, using a soft microfibre cloth. It will help protect against greasy finger marks, and leave the film free of dirt.
Touching your negatives this way isn’t ideal so be sure to try an air blower before getting the film cleaner out.
Tip: Get Organised
A good tip, worth mentioning, is to keep your negatives organised from the beginning. It is really useful to add information such as date, location, and camera to your negative sleeves. As well as keeping them in some kind of order, this will make it easy to find the negatives you need when scanning or printing them months, or even years, later.
This guide to
You might also be interested in our Film Processing Shopping List and Beginners Guide To Film Photography
Explore
News • Guides • Community • Film Reviews • Film Developing Times • Choose Your Film